Telepresence Installation and Configuration
Telepresence provides a VPN solution into the Kubernetes cluster shich means developers can use the Internal Kubernetes DNS service to access resources running in the Cluster without the need for public ingress. This requires a simple setup script outlined below.
Prerequisites
A Github user with membership of the CroudTech organisation and access to the relevant Kubernetes cluster containing the resources to be accessed - this is typically the development cluster at
https://rancher2-staging.croud.techSudo level workstation privileges
This is usually the password used to login to the developer workstation (assuming admin level access).
MACOS
Homebrew is installed. If this does not exist (check by typing brew into a terminal), homebrew can be installed by following the instructions here: https://brew.sh/.
UBUNTU
Snap and Apt Package Managers are installed
Process
1. Install kubectl
Kubectl must be installed on the development workstation, and the version installed must be within 1 minor version of the target cluster.
MACOS
curl -LO https://storage.googleapis.com/kubernetes-release/release/v1.10.3/bin/darwin/amd64/kubectl
chmod +x ./kubectl
sudo mv ./kubectl /usr/local/bin/kubectl
UBUNTU
$> sudo snap install kubectl
2. Configure kubectl
This assumes that a new installation of kubectl has occured, and no existing configuration files exist.
Create a kubectl config file in the following location:
~/.kube/config
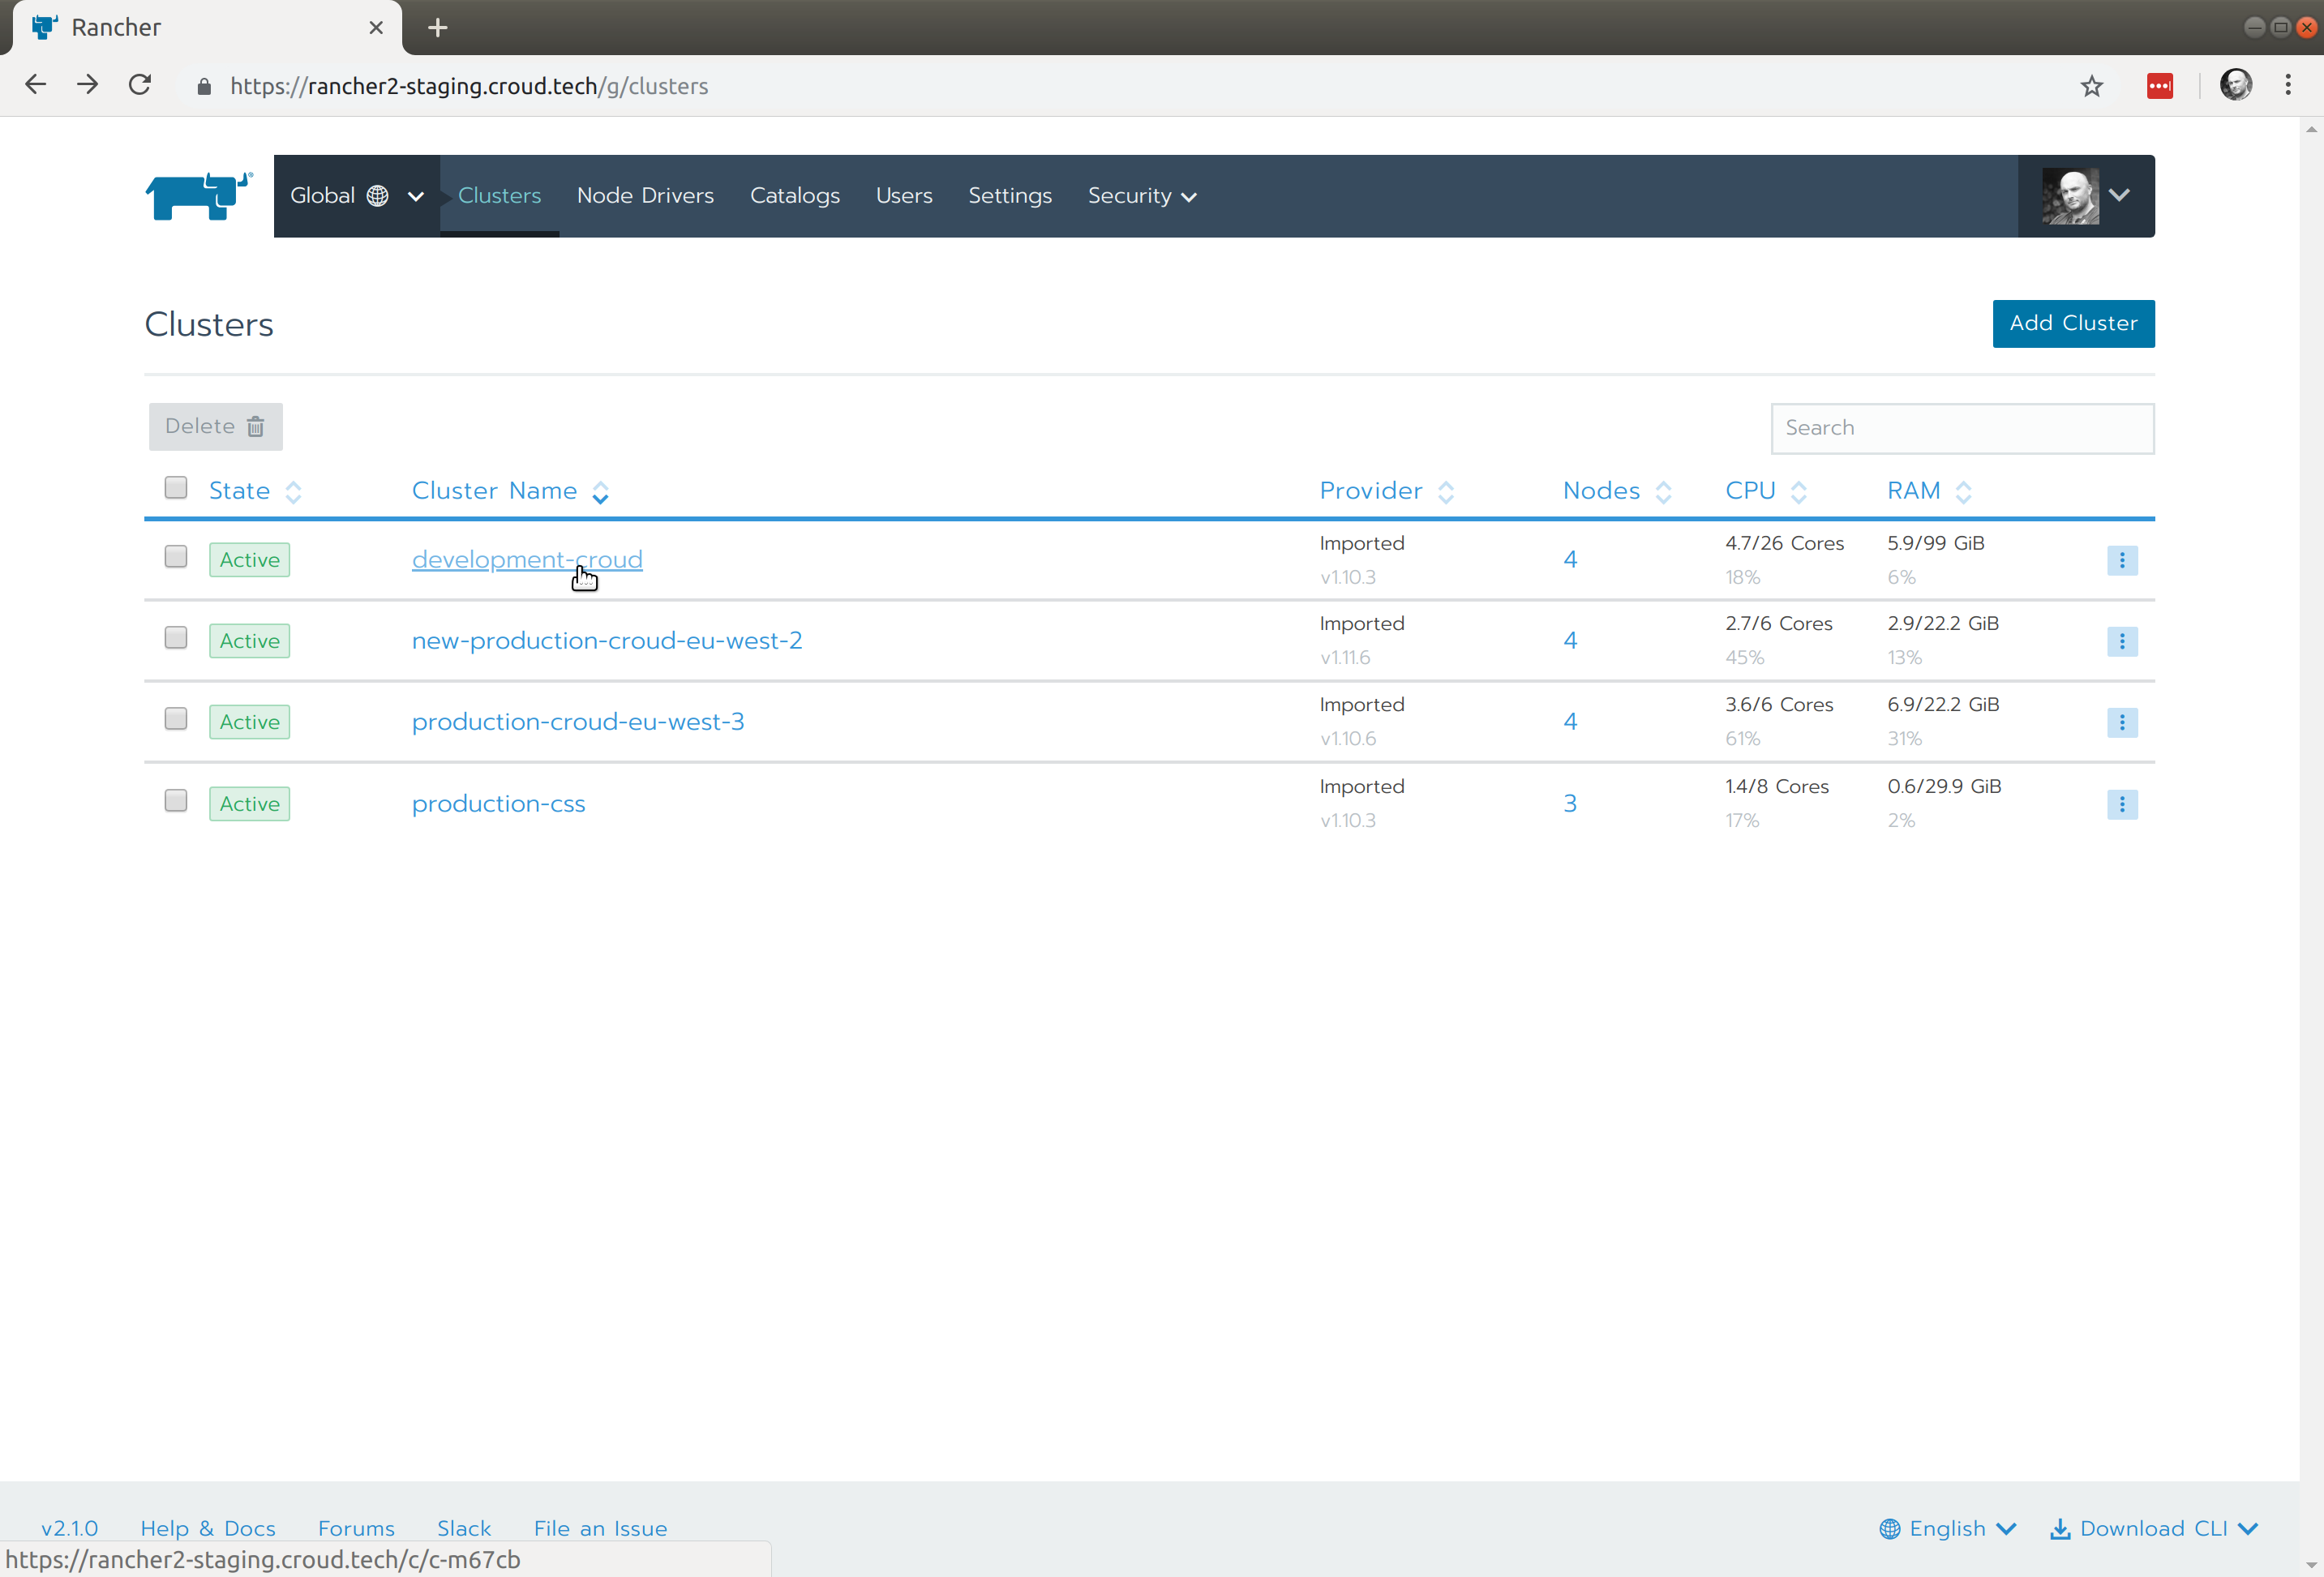
To retrieve valid Kubeconfig file contents, access the rancher UI via the url
https://rancher2-staging.croud.tech
Login via Gitgub and select the Cluster to which VPN access is required from the list:
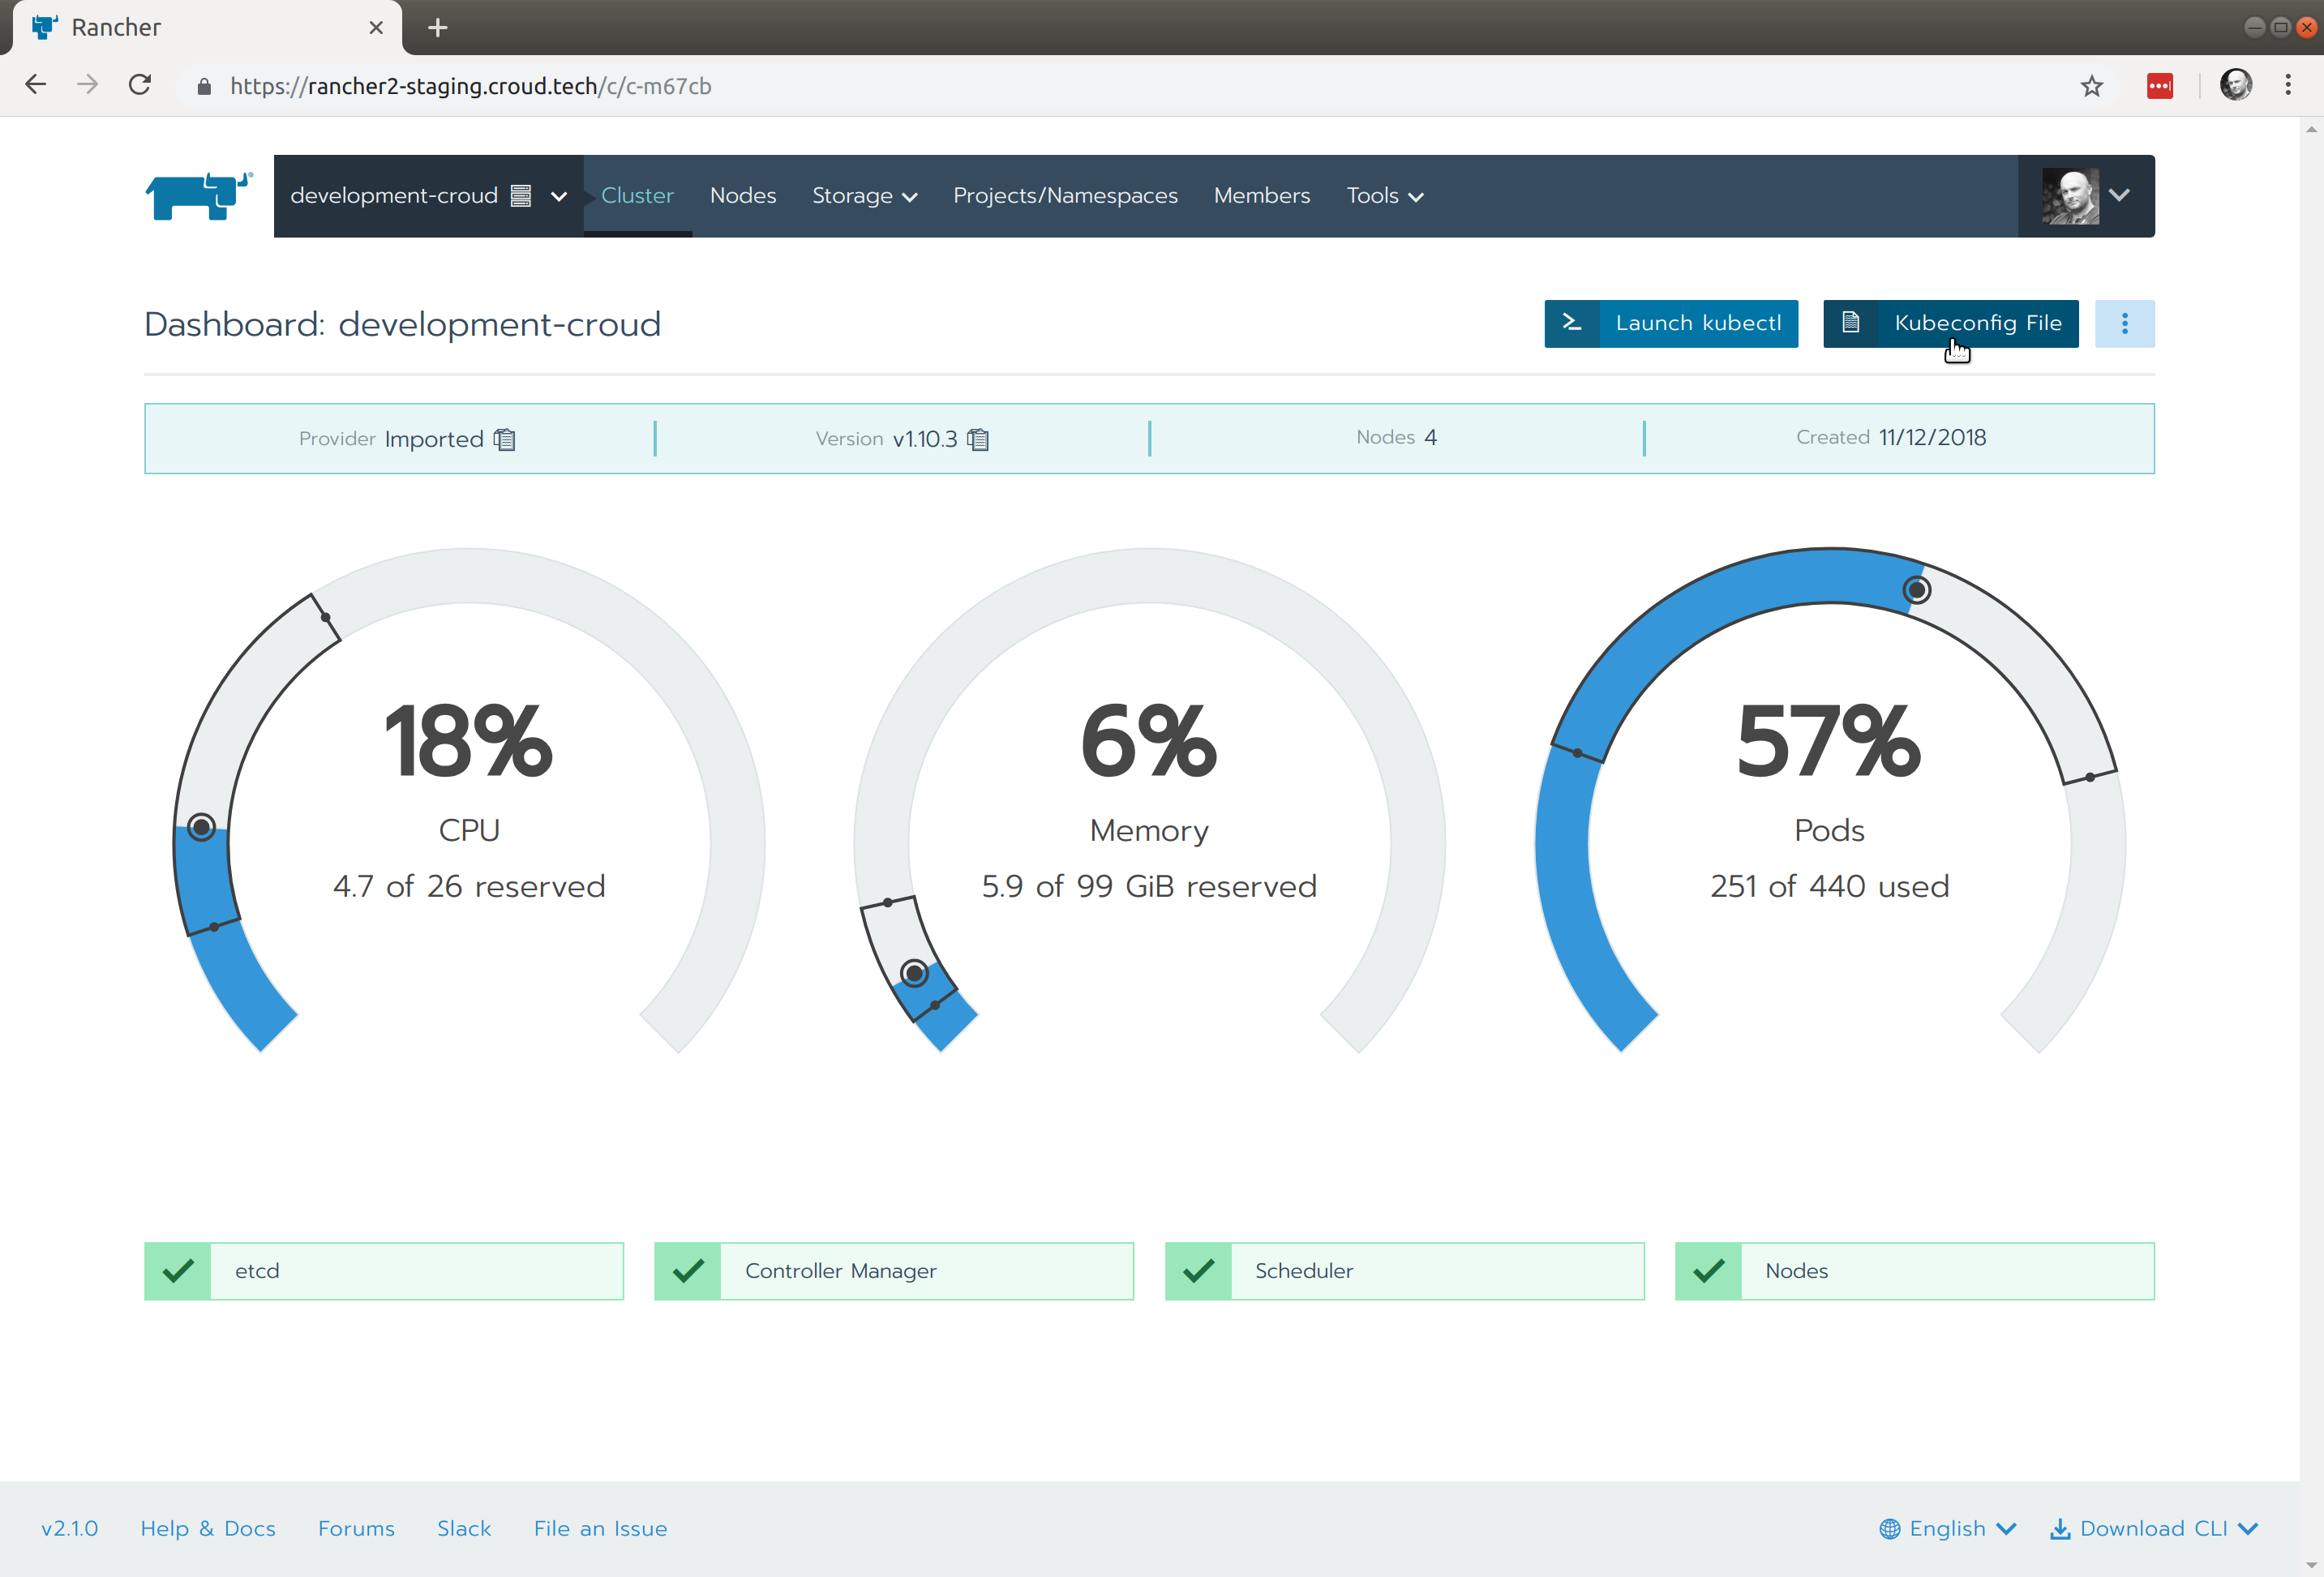
From here select the Kubeconfig file link:
This will reveal a user specific Kubeconfig file:
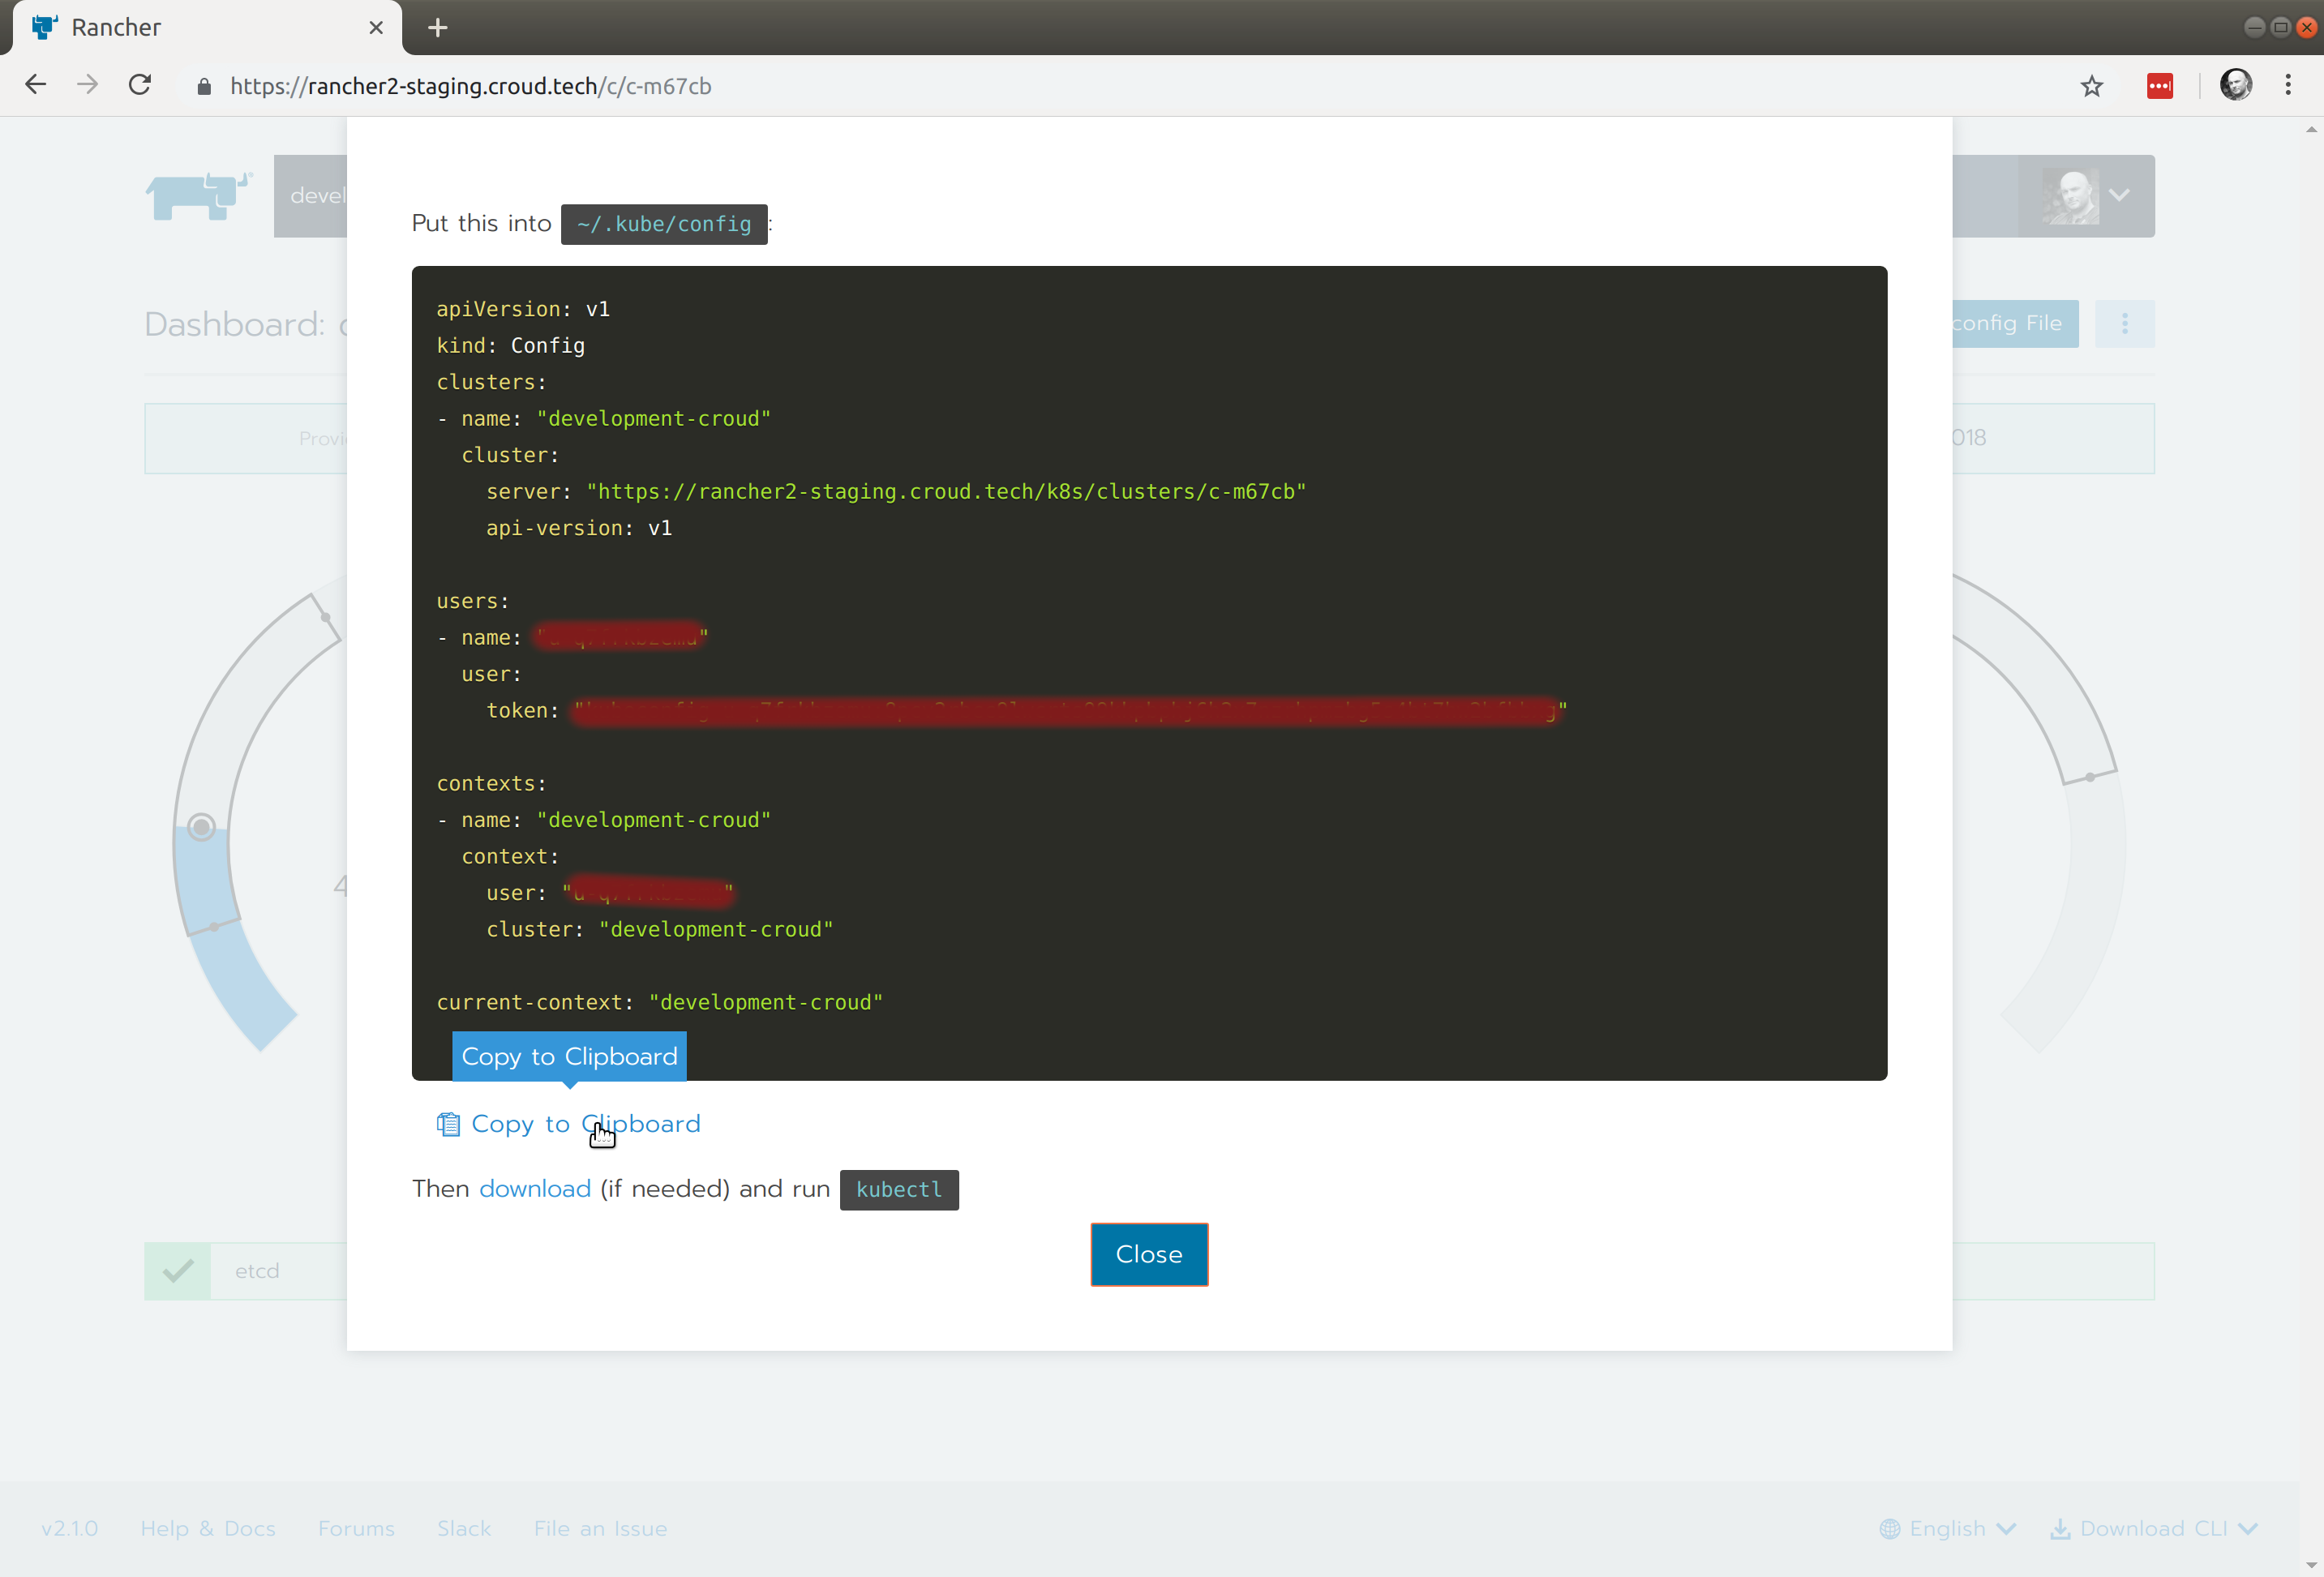
Copy the contents and paste into the file created in step 2, a valid file will resemble that shown below:
apiVersion: v1
kind: Config
clusters:
- name: "development-croud"
  cluster:
    server: "https://rancher2-staging.croud.tech/k8s/clusters/c-m67cb"
    api-version: v1

users:
- name: "<<YOUR_USER>>"
  user:
    token: "<<YOUR_TOKEN>>"

contexts:
- name: "development-croud"
  context:
    user: "<<YOUR_USER>>"
    cluster: "development-croud"

current-context: "development-croud"
3. Install telepresence
MACOS
Install telepresence from homebrew:
brew cask install osxfuse
brew install datawire/blackbird/telepresence
UBUNTU
Install telepresence via Ubuntu Package Manager:
$> sudo apt-get update
$> sudo apt-get install telepresence
4. Connect to the Cluster via the Telepresence VPN
Telepresence will attempt to connect to the cluster currently assigned to current-context in the kubeconfig file from step 2.
Run the command below in the terminal:
$> telepresence
After a moment the command prompt will return signifying that telepresence has connected.
T: Warning: kubectl 1.13.3 may not work correctly with cluster version 1.10.6
T: due to the version discrepancy. See
T: https://kubernetes.io/docs/setup/version-skew-policy/ for more information.
T: Starting proxy with method 'vpn-tcp', which has the following limitations:
T: All processes are affected, only one telepresence can run per machine, and
T: you can't use other VPNs. You may need to add cloud hosts and headless
T: services with --also-proxy. For a full list of method limitations see
T: https://telepresence.io/reference/methods.html
T: Volumes are rooted at $TELEPRESENCE_ROOT. See
T: https://telepresence.io/howto/volumes.html for details.
T: Starting network proxy to cluster using new Deployment
T: telepresence-1550095525-2570639-5864
T: No traffic is being forwarded from the remote Deployment to your local
T: machine. You can use the --expose option to specify which ports you want to
T: forward.
T: Guessing that Services IP range is 100.64.0.0/13. Services started after
T: this point will be inaccessible if are outside this range; restart
T: telepresence if you can't access a new Service.
T: Setup complete. Launching your command.

@production-croud-eu-west-3|bash-4.4$
Services running within the cluster can now be accessed via the internal rancher DNS service, all requests made from the workstation will attempt to use the Rancher internal DNS
http://<<SERVICE>>.<<NAMESPACE>.svc.cluster.local
http://<<SERVICE>>.<<NAMESPACE>
Note that the IP addresses are likely to change frequently, so internal service URLs should be preferred.
Advanced Setup - Proxying traffic
While the basic setup above can be used gain access to internal services running within the application cluster, Croud development environments are protected via an IP whitelist which requires additional cluster configuration to access over the public internet. Telepresence can also be used to proxy traffic to specific destinations (IP address, IP Address range or Hostname) via the Telepresence VPN. This means that for developers working on these clusters with a telepresence connection, this additonal whitelisting is not necessary, this is acheived using one or more --also-proxy arguments when opening the Telepresence connection.
For example the following command would proxy an public DNS request to the hostname myingress.example.com via the Telepresence VPN:
telepresence --also-proxy myingress.example.com
Use the following command to proxy all traffic to the Croud development load balancer via your Telepresence VPN connection. Replace myloadbalancer.development.example.com with the address of the load balancer you wish to proxy, ask the Croud DevOps team for this if you are unsure.
telepresence $(dig A myloadbalancer.development.example.com | grep "IN A" | awk '{print " --also-proxy " $5}' ORS=" ")
Explanation
The commands in the $() grab a list of all the A records for the load balancer hostname myloadbalancer.development.example.com (removing the need to manually add IP addresses if the load balancer changes) and adds them as --also-proxy IP arguments for telepresence. So the above command actually runs:
telepresence --also-proxy 123.333.222.1 --also-proxy 123.333.222.2 --also-proxy 123.333.222.3
This will then send all internal kubernetes traffic and external ingress traffic through the telepresence VPN connection.
5. Cleanup
The Telepresence connection creates a pod in the target cluster where the VPN terminates:

In order to ensure this is removed, the VPN session should be cleanly terminated by running the command below, this will trigger the running pod to be removed.
$> @production-croud-eu-west-3|bash-4.4$ exit
exit
T: Your process has exited.
T: Exit cleanup in progress
T: Cleaning up Deployment telepresence-1550096881-5661159-11605
6. Misc.
Run the command below to explore options or consult the Telepresence docs
$> telepresence --help
If multiple Clusters are configured in Kubeconfig then the desired cluster can be selected using the telepresence --context command line flag.
$> telepresence --context CONTEXT_NAME
Installation Help
Kubernetes installation docs:
https://kubernetes.io/docs/tasks/tools/install-kubectl/
Telepresence installation docs: